Tools and tips
This page contains a wide variety of tools, mostly inexpensive or free software, that you can use to make VFEs. At the bottom is a vignette of how a teacher might construct and use a VFE.
Below are buttons that will take you to other pages on making and using VFEs.
Contents
What do I Need to Consider as I Begin to Build my VFE?
Technical Tools of Real and Virtual Fieldwork for Scientific Inquiry
- Smartphone and Tablet Apps for Accessing Information About a Field Site
- Smartphone and Tablet Apps for Capturing Aspects of a Field Site
- Desktop Software
- Web-based Tools
- Hardware
- Google Earth Files Useful to a Range of VFEs
The Quarry Query: What is this Place? — A VFE Vignette
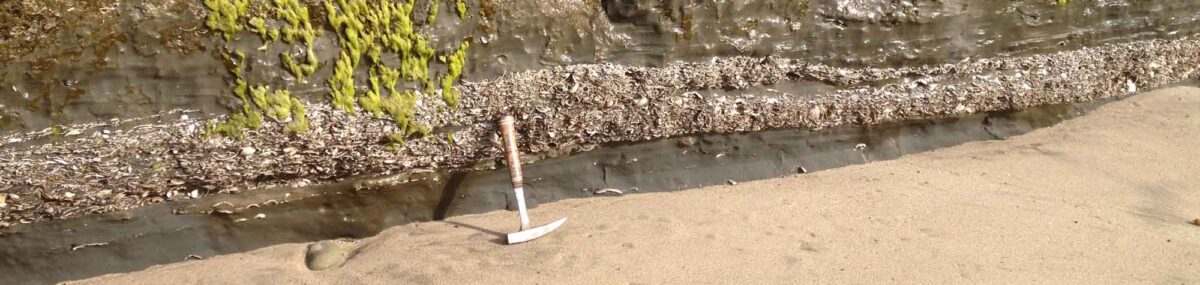
Image above: Exposure of the fossiliferous Pliocene Purisima Formation at Capitola Beach, Capitola, California. Explore this location in the EPICC Central California Coast VFE. Photograph by Jonathan R. Hendricks for PRI's Earth@Home project (CC BY-NC-SA 4.0 license).
What do I Need to Consider as I Begin to Build my VFE?
Considerations fall into four categories:
- Logistical: What do I have the attitude, time, resources, and skills to do? Attitude is listed first as it is the most important factor.
- Pedagogical: How do I bring the scientific content together with technologies in a way that best builds enduring understandings of bigger ideas and overarching questions, as well as the smaller scale ideas and questions I deem important?
- Technological: What hardware and software do I need to assemble the materials for the VFE and to make it accessible to my students? This may include traditional scientific tools, like a rock hammer or a compass, as well as the computer technologies discussed in this packet and on our website.
- Content: What scientific knowledge, ideas, processes, and practices do I want my students to understand and be able to do at the end of the experience?
Of course, these categories overlap and interplay substantially—teachers of Earth science use Google Earth in different ways than other Google Earth users, for example. (These are issues of Technological, Pedagogical and Content Knowledge, or TPACK for short. See here for more information)
Technical Tools of Real and Virtual Fieldwork for Scientific Inquiry
While the pace of change makes listing technological tools a challenging and always incomplete task, we've found some tools especially useful. Descriptions, unless otherwise noted, are taken from the linked web page. Some tools have multiple competitors, and new tools emerge all the time. We expect that there are already superior tools to some of those we list here; and that new and better tools will emerge. We welcome your suggestions for additions to these lists.
Smartphone and Tablet Apps for Accessing Information About a Field Site
-
Flyover Country mobile app for geoscience - "Learn about the world along the path of your flight, hike, or road trip with GPS tracking. Offline geologic maps and interactive points of interest reveal the locations of fossils and georeferenced Wikipedia articles visible from your airplane window seat, vehicle, or hiking trail vista." Free.
-
ROCKD "Learn, explore, and document your geologic world. Curious what you're standing on? The Dashboard distills key facts about your location into a single, easy-to-read interface. Record your observations. Rockd allows you to easily record your geological observations and uses your location to provide spatially informed suggestions for nearby geologic units, time intervals, and fossils." Free.
-
EarthViewer "What did Earth look like 250 million years ago? Or 1 billion years ago? Or 4.5 billion years ago? What was the climate like in the deep past? Find the answers with EarthViewer, an interactive tool for exploring the science of Earth's deep history." Free.
-
Your favorite GPS app. There are many GPS apps available with different feature sets. Some are free.
-
Your favorite field guides. There are many field guide apps available for rocks, fossils, flora, and fauna. Some are free.
Smartphone and Tablet Apps for Capturing Aspects of a Field Site
A Critical Zone Tree at the Southern Sierra Critical Zone Observatory (CZO). This is one of the most heavily instrumented trees in the world. Note that this image is an interactive Street View panorama. Use your mouse and the controls in the upper right corner of the image to view fullscreen, and to pan and zoom. Explore CZOs, including the Southern Sierra CZO, in Virtual Fieldwork Experiences here.
-
Google Street View An interactive Google Street View Panorama, captured on an iPhone, is shown above. For iPhone and Android. Free.
-
Trnio "We are a mobile software company that converts your photos into 3D models. We let you create, share and discover 3-D maps in minutes." Currently this is only available for iPhone and iPad. $4.99.
-
phyphox physical phone experiments allows you to access the sensors in your phone. Sensors vary by phone, but typically include accelerometer, magnetometer, gyroscope, light sensor, pressure, proximity sensor, microphone, GPS/Location. For iPhone and Android. Free.
-
Skitch allows for simple annotation of photos and maps in the field. It is also helpful for field instruction. Rather than pointing to some feature on a distant cliff face, for example, the instructor can snap a picture, label it in Skitch and show the phone to students to guide their eyes. For iPhone and Android. Free.
-
Solocator "Solocator is a GPS camera for fieldwork. Overlay and stamp photos with GPS location, compass direction, altitude, date & time taken." $0.99 Offers In-App Purchases.
-
iNaturalist "iNaturalist is an online social network of people sharing biodiversity information to help each other learn about nature." For iPhone and Android. Free.
-
A clinometer/level app. There are several apps for helping to measure the strike and dip of rocks.
-
Your phone or tablet's compass. It's good to know what direction you are looking or moving.
-
Your phone or tablet's camera/photo app. Using your device's camera for at least some of your photos is a good idea as it embeds location data in the photo. This feature can be turned off if desired.
-
A video editing app. There are many apps that allow you to edit on your phone. The choices change rapidly.
-
Other specialty photo/camera apps. There are many apps that help with photo management, uploading, and processing, as well as those that allow for greater control of your camera's features.
Desktop Software
- Google Earth "Create maps with advanced tools on PC, Mac, or Linux." The newest version of Google Earth is web-based but does not operate on older computers. Older versions of the desktop software remain available. Google Earth Pro is now available at no cost. Free.
Web-based Tools
- "Esri Story Maps let you combine authoritative maps with narrative text, images, and multimedia content. They make it easy to harness the power of maps and geography to tell your story." Free.
- Google Earth "Create maps with advanced tools on PC, Mac, or Linux." The newest version of Google Earth is web-based but does not operate on older computers. Older versions of the desktop software remain available. Google Earth Pro is now available at no cost. Free.
- TouchTerrain "Easily Create 3D-Printable Terrain Models." Free.
- Sketchfab "Sketchfab is empowering a new era of creativity by making it easy for anyone to publish, share, and discover 3D content on the web or in VR." Sketchfab can host models created in TRNIO. A model created in TRNIO and hosted on the Sketchfab site is shown below. Free.
"Purisima boulder" by Don Haas (Sketchfab).
Hardware
The hardware listed here also has associated software.
- Gigapan "Gigapan provides a complete solution to create immersive, high-resolution panoramic images."
- SmartScope iGo "The newest addition to the award-winning SmartMicroScope family of handheld digital microscopes will connect wirelessly to the iPad, iPad mini, iPod Touch, and iPhone using a FREE app in the iTunes store."
Google Earth Files Useful to a Range of VFEs
- Earth Point USGS Topographic Maps Layer Displays USGS Topo Maps on Google Earth. For USA only.
- Geologic maps of US states (kmz files) Also available in HTML with links to resources beyond geology here.
The Quarry Query: What is this Place? — A VFE Vignette
By using a simple set of photographs and some guiding questions, Mrs. G. and her students explore the question that drives all of our VFEs: Why does this place look the way it does?
The VFE Vignette described below was developed by Dr. Don Haas for the Regional and Local (ReaL) Earth Inquiry Project that produced PRI's original Virtual Fieldwork website, virtualfieldwork.org. It is modeled after those in 1996 The National Science Education Standards, and it remains consistent with principles of good teaching espoused in the Next Generation Science Standards. It describes how a VFE might look in a high school or middle school Earth science classroom. The vignette is a composite of experiences together with bits of fiction. All names are fictitious. The vignette is not intended to serve as a model of what to do but rather as food for thought.
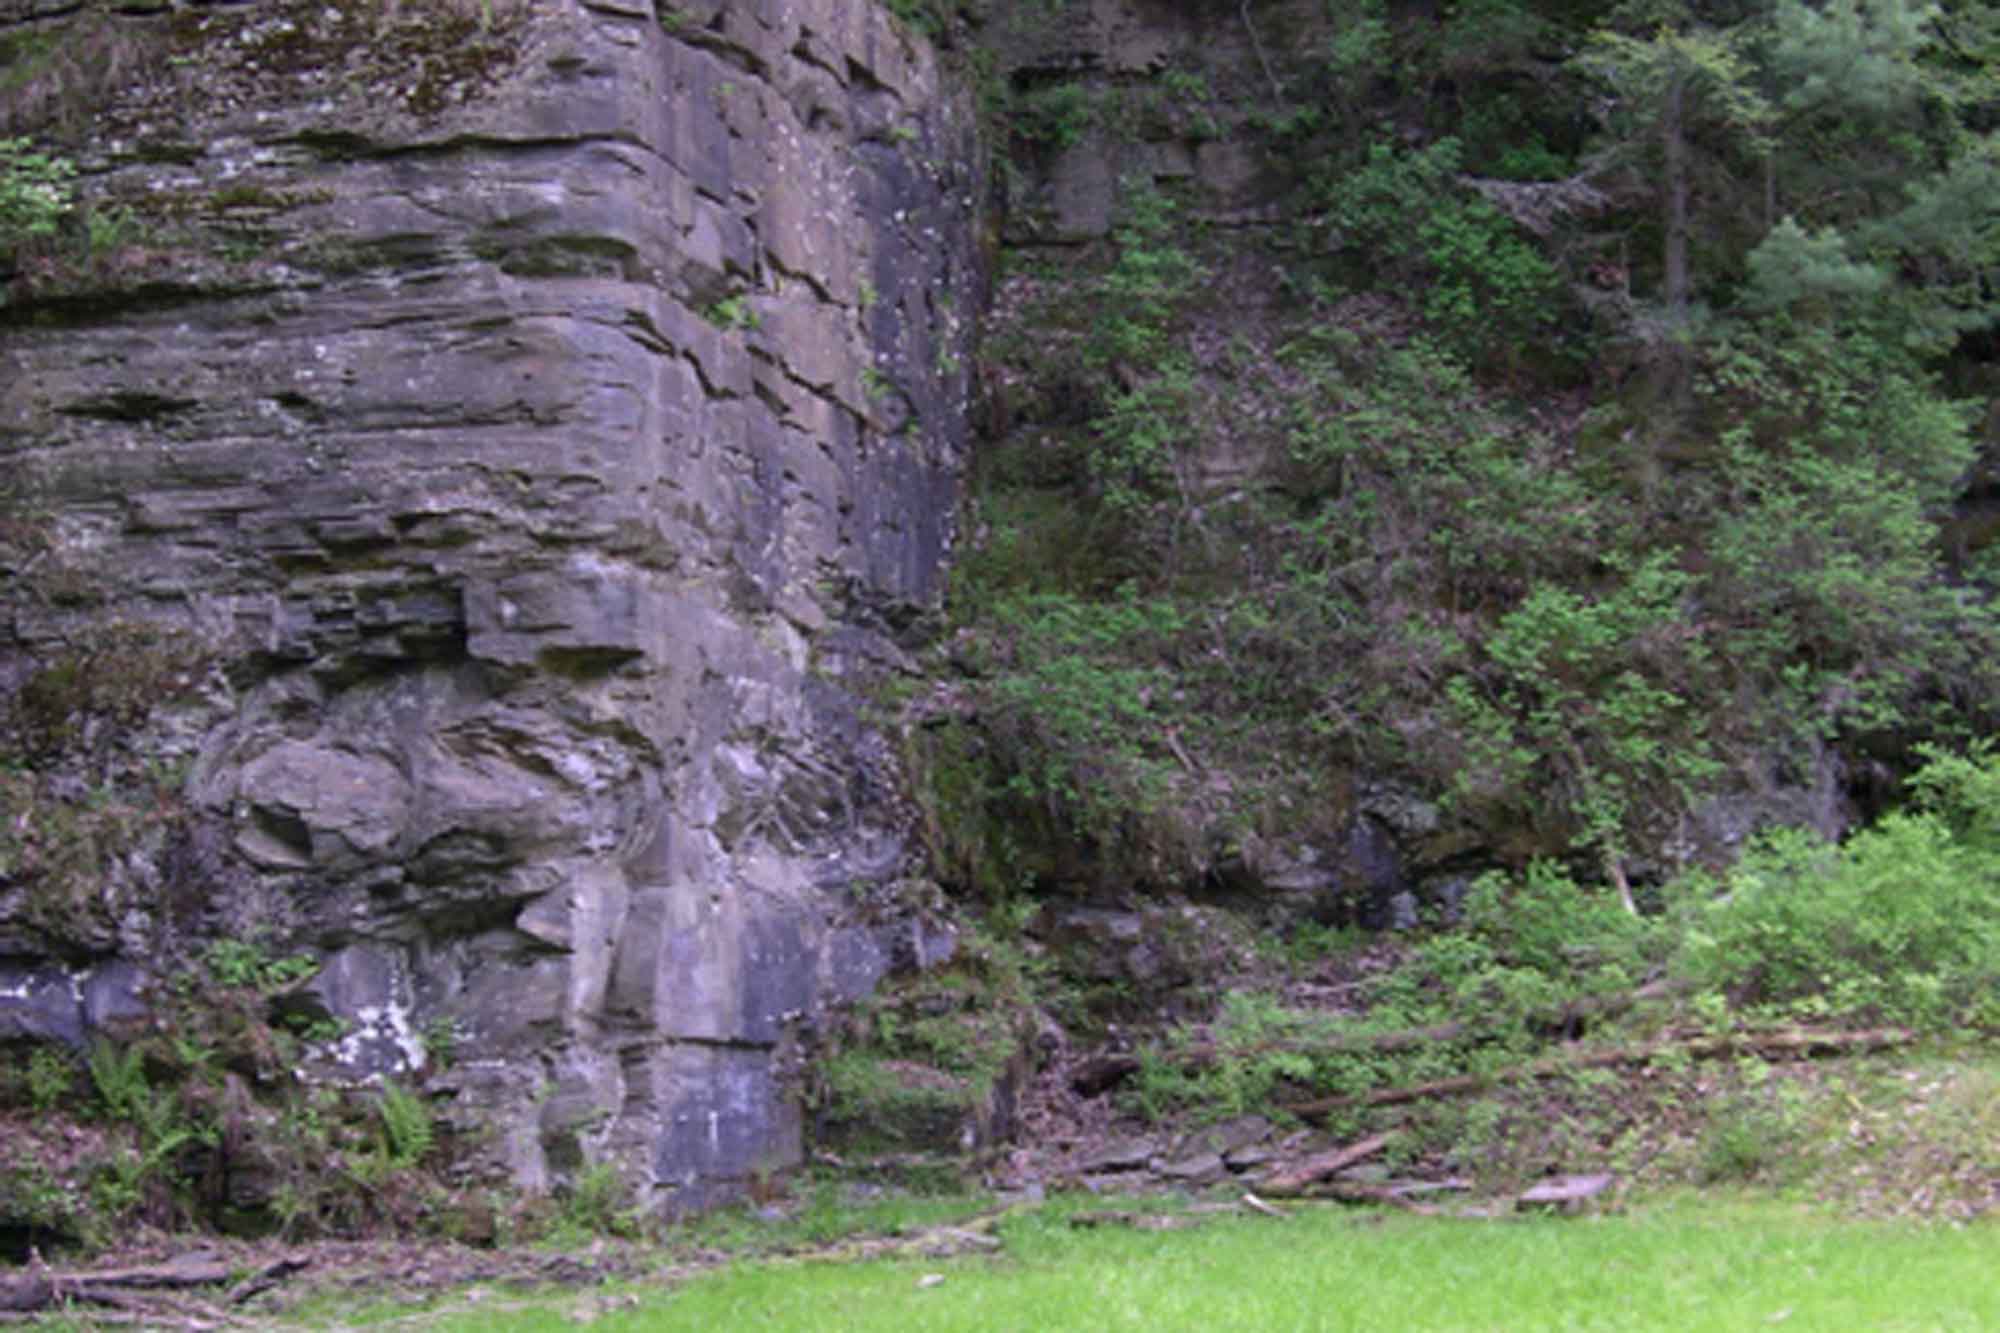
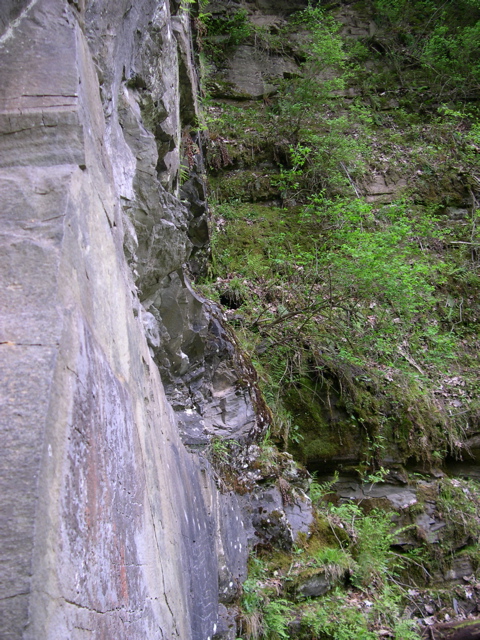
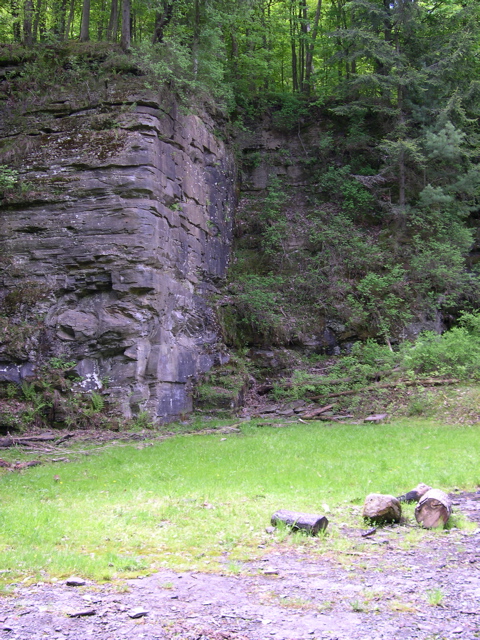
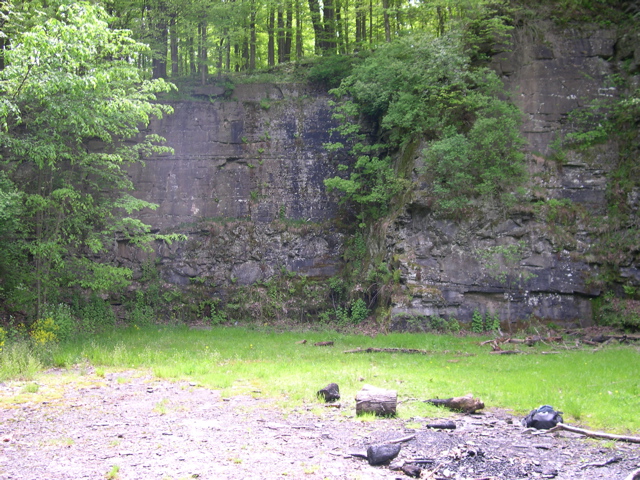
The rock feature discovered by Ms. G during her hike in the woods.
In this example, Ms. G had taken a hike in the woods and found a rock feature that didn’t match its surroundings. Through virtual fieldwork that she created, she engaged her students in the puzzle of figuring out why the place looked the way it did. She had shot several photographs. And she brought back a few rocks.
She’d done this a few times over the course of the year–in effect taking her students on virtual fieldwork. Over time, she’d built up a number of such activities that took her students where she’d been through the power of her description and a framework that she was forever developing. Of course, she’d rather literally take students to all of these places, but that wasn’t manageable. She didn’t have the field trip budget and she knew that other teachers didn’t like having kids pulled out of class to go on field trips. In some years, there was money for field trips and they were great–and they were better still if they’d done virtual work first. When she could only do one actual trip, she did it later in the year. In years when there wasn’t a budget crunch, she’d do two–one at the beginning of the year where she raised more questions than were answered and a second near the end of the year where the students would raise and answer questions. Every year, without fail, she took students around the school’s campus and had them tell the geologic story of the school’s grounds.
There were certain things she’d learned to do on each one of these trips (whether with the kids or when she went on her own to create a virtual trip for her kids). She took a GPS unit and recorded the coordinates of points of interest. She took her digital camera, and sometimes her video camera. She could then incorporate images of the place into both student handouts and into computer slideshows. If it was in a place where she had permission to collect, she’d bring her rock hammer (if she thought she’d need it).
This time, she took a slightly different approach with her use of pictures. She created a quick and simple web page of the pictures, which are shown in the gallery below.
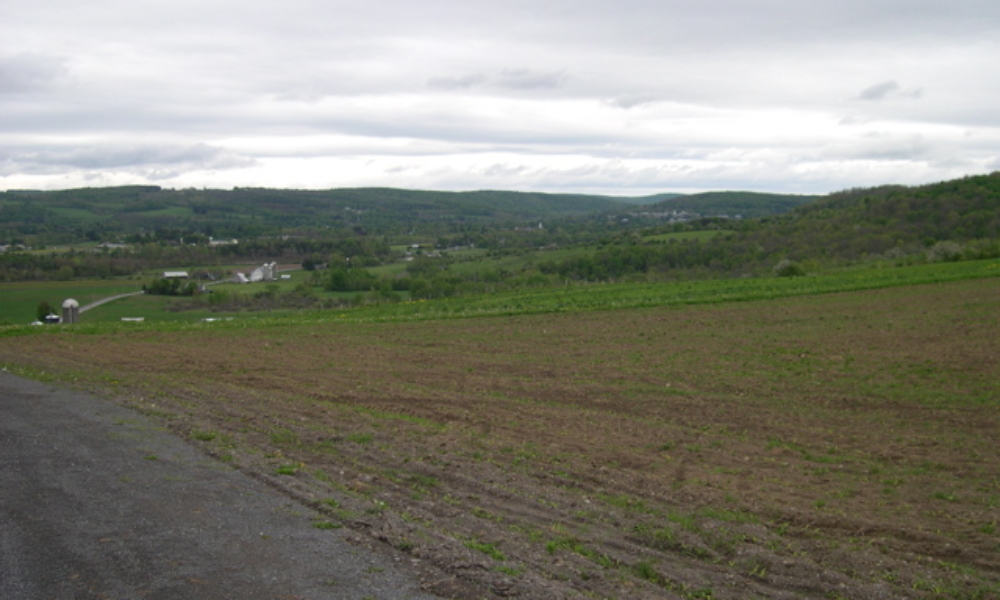

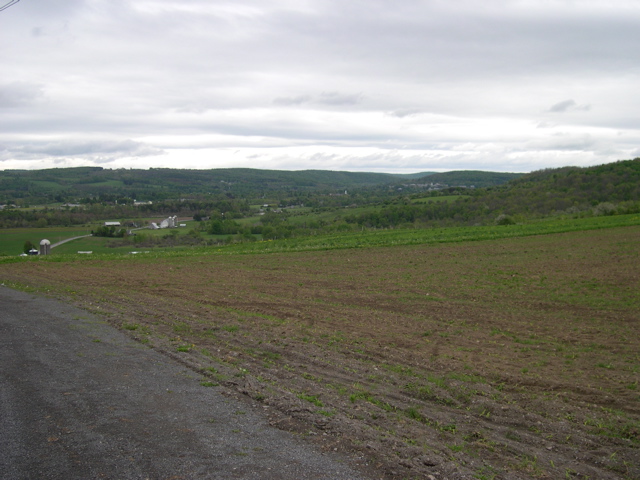


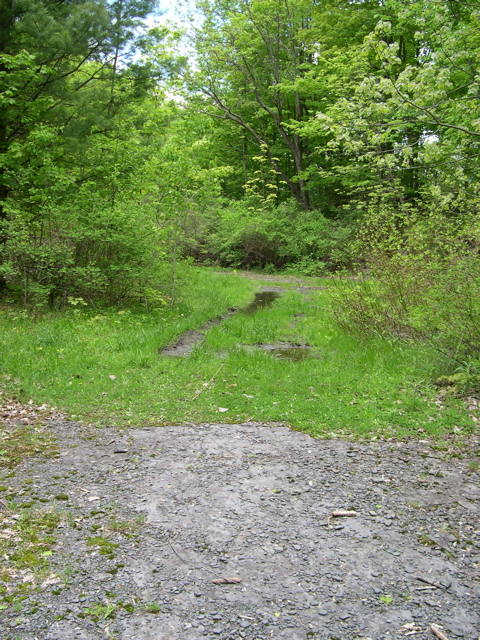
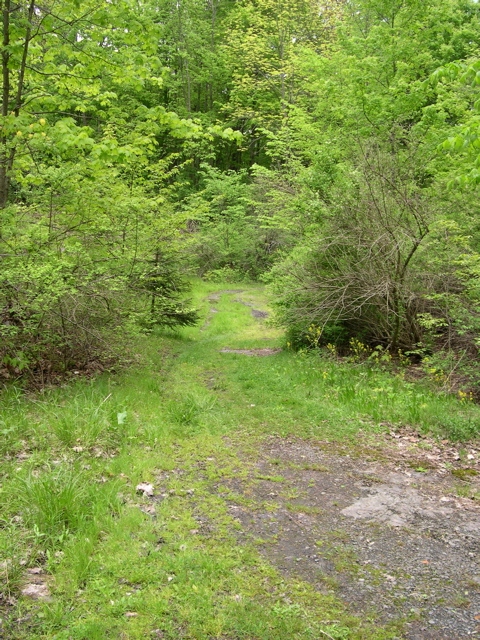
This was very simple to do with online Google products used by her school. She used the web space provided by the school district. She’d added a label on the top of the page and gave a few of the photos titles, but she didn’t sort through them. She both didn’t have time and thought it would be interesting to have the kids figure out which pictures were better for showing whatever it was they wanted to show. Earlier in the year, she’d done more of the sorting through of things like this, but was consciously trying to gradually shift more and more of the responsibilities of learning and teaching to her students.
The class begins by Ms. G talking about the hike she’d taken over the weekend. She was hiking in the woods on a hilltop not too far away, but far enough away and remote enough that it wasn’t likely her students had been there.
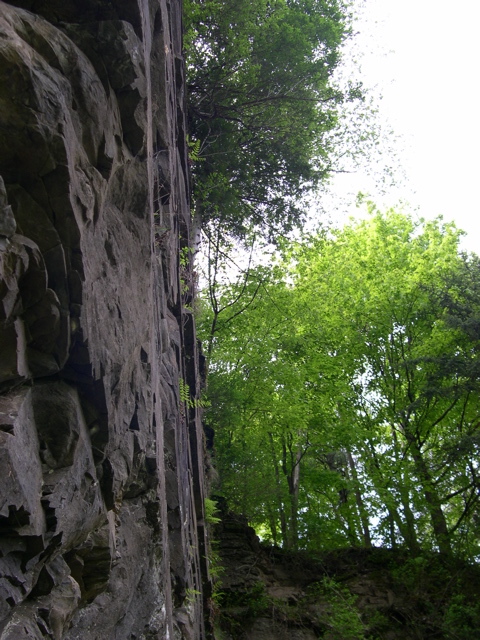
She told the class that she was walking along the trail through the woods, and then she came around a bend in the trail and found an area that was partly surrounded by vertical rock walls about 10 meters high. She showed several pictures by clicking through the web page mentioned above. The students got into their regular working groups of three or four. Each group was given two rock samples and a handout that included pictures of the area. Ms. G. told the class to take about ten minutes to analyze the information they had about this place and then be prepared to talk about it. “If you think you know something about the area, remember to be prepared to describe how you know what you know.”
The handout also included a set of questions, but these questions were, for the most part, not new to the students. The question page was titled “Why does this place look like this?” and all the questions that followed were intended to connect back to this main question. The questions that followed the lead question were:
- What kind(s) of rock(s) are found in the area? How do you know? What environment did these rocks probably form in?
- Describe the arrangement and variety of rocks shown in the photographs.
- Tell a story of how these rocks may have formed referring back to the photographs and what you have determined about the rock sample(s).
- What has happened to this area to make it look the way it does today? (That is, what has happened to the area since the rocks formed?) Why do you think so (what is the evidence for your claim)?
- If you could go to the site, what else would you want to do to answer the above questions?
Ms. G. wanted to teach through inquiry methods. She wondered if this somewhat formulaic approach would be considered inquiry. In all these virtual fieldwork experiences, she had a good idea of what students would discover. In this case, she expected them to figure out it was an abandoned quarry where the limestone came from that built the old buildings on a nearby university’s campus. This approach did include part of one of the New York State Key Ideas for Scientific Inquiry: “Beyond the use of reasoning and consensus, scientific inquiry involves the testing of proposed explanations involving the use of conventional techniques and procedures and usually requiring considerable ingenuity.” She wondered about the ingenuity, but took some solace in its apparent absence in the one example in the Core Curriculum Guide. That example? “Test sediment properties and the rate of deposition.”
In the last year she added what she hoped would be an additional motivation for learning. She’d added a new essential question to her list: “What does learning this empower you to do?” This allowed her to more explicitly teach metacognition and it allowed her to draw out of her students answers to the question, “Why do we have to learn this stuff?” If they answered it themselves, they were being metacognitive and they were getting answers to this important question. If it worked.
While she wondered about whether or not what she was doing could truly be classified as inquiry, she had confidence that it was more effective than what she used to do–stand at the overhead and literally crank through notes. (The crank advanced the roller of transparency film). She believed it was more effective for many reasons, but perhaps most importantly she saw a clearer connection among the different things she taught and it seemed her students did too. Instead of identifying rocks and minerals for the sake of identifying rocks and minerals and learning something more broadly about taxonomies and dichotomous keys, students now had a purpose for identifying those things. If they figured out what it was, then they also had a good idea of how it formed. If they had a good idea of how it formed, they could use that to understand something about the history of a place. They could use this understanding as part of a story, an unraveling mystery that they were active in unraveling themselves. In this case that story also connected to the human history of the area. This quarry provided the stone that built some of the oldest buildings in the county and at least the first one of those buildings was built by students working together with their professors. This use of story provided a sense of wholeness that had been missing in her teaching.
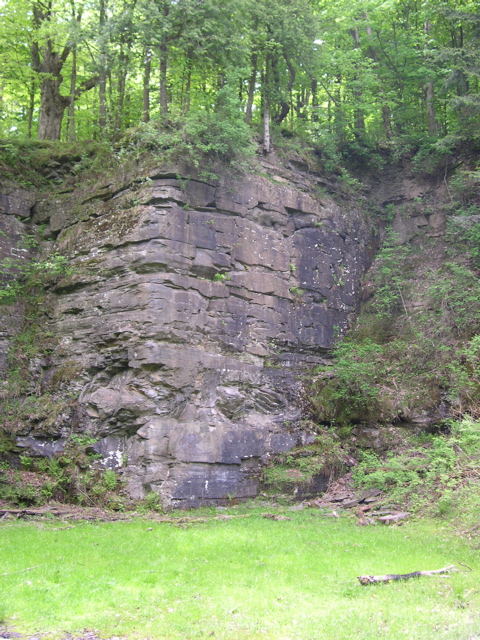
What the area looked like:
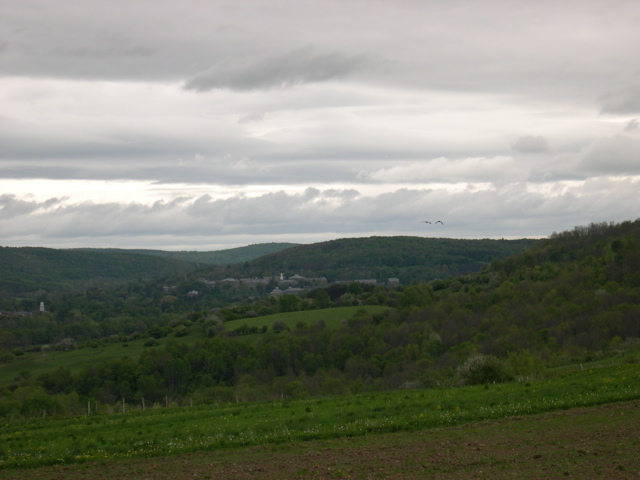
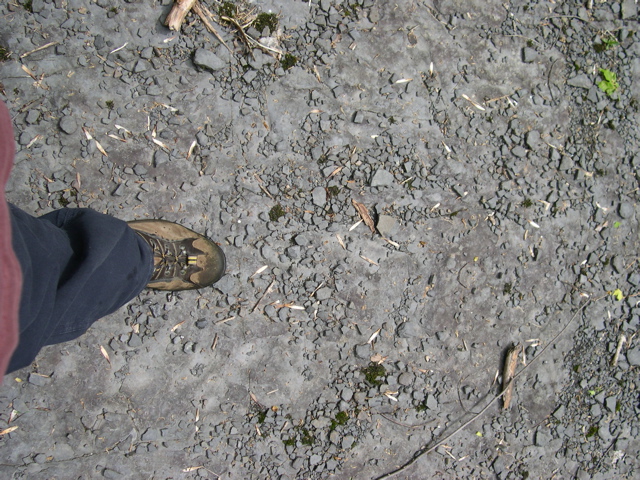
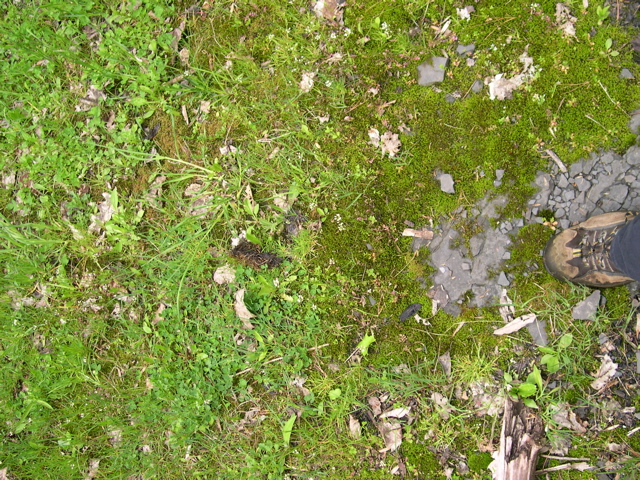
The area that was partially surrounded by those vertical rock walls had a flat floor that was largely moist but didn’t have any spots where the water was more than several centimeters deep. Bare, flat rock was exposed in several places on the floor of this place. She had paced some of it out to get a rough idea of the dimensions of the place and had taken several photographs.
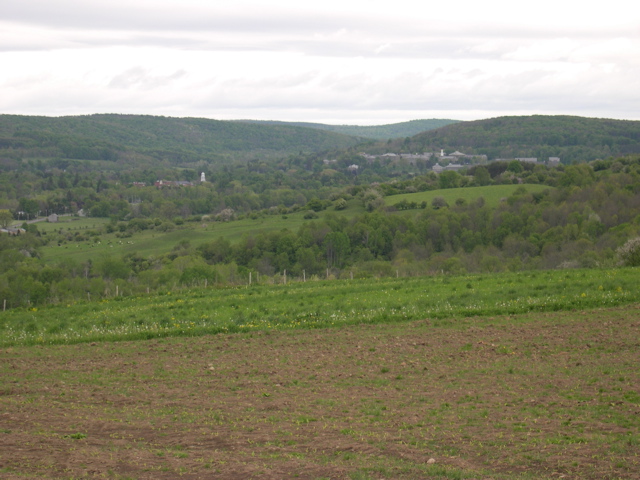
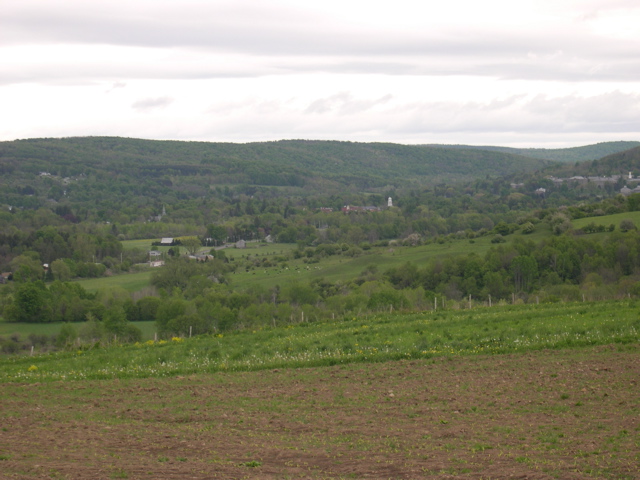
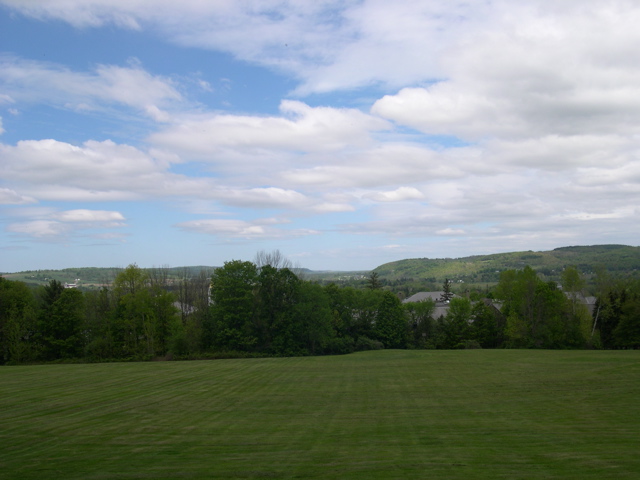
Her photographs showed the lay of the land for the larger area surrounding the spot. All the hills were about the same height – it looked to the students that she was in the same region as where they lived, and a few recognized that her first pictures included a nearby university’s campus. Once this word was out, students knew that it was in the same landscape region. “That means it’s all sedimentary rock,” said Joe.
This was confirmed by the presence of fossils in some of the samples. As the students studied the rock samples, and the pictures of the cliff faces, you could hear them working through rock ID tables. “Is it a sandstone?” Came one question. “No, it’s too smooth.” Came a quick reply. “Look at how flat the sides are. Are they crystal faces?” “That’s one ugly crystal if they are. Remember, the other piece looks a lot like this one, but it’s got fossils in it. Oh look! There’s a fossil on this one too!” “Is it limestone?” “Should we do the acid test?” They tested it and it fizzed. Limestone it was.
One group wanted to know the coordinates immediately, and Ms. G. knew but she wouldn’t surrender that information without the students first having explained how the area in the pictures came to look the way it did. They didn’t have much to say initially so she made them wait. She knew they wanted to go to the computer and to the USGS map viewer. Once they plugged in the coordinates, they’d see the quarry symbol on the map. (The coordinates were: 75° 31’ 56” West, 42° 48’ 50” North. (Stated in decimal degrees, -75.532 ; 42.814)).
Another group was more focused on the pictures. Katelyn said, “In 823, you can see rock layers, so it definitely looks like sedimentary rock.” Ms. G was standing nearby and was glad they were sorting through the pictures as she’d hoped. “It looks kind of like a gorge, but it looks like there’s only one side to it.” “There’s not really anything that looks like a stream or a stream bed, but that might just be missing from the pictures. That’s one thing to look for if we were able to go up there.” “Or if we knew where it was on a topo map.” “Ms. G!” They got her attention. “Can we look on a topo map? We want to know if there’s a stream there that might have carved out a gorge.” Ms. G responded, “That’s a good idea to investigate. I want you to think a bit more before I give you the coordinates though. I will tell you that it wasn’t a gorge. It’s fairly close to the hilltop you see here.” She was pointing to a spot on one of the pictures taken from across the valley. “Do you think a gorge would be on a hilltop?”
The group who had wanted the coordinates right off was moving somewhat slower than the other groups. Ms. G wandered over to check in and maybe push them along a bit. She asked, “What can you tell me?” There were shrugs. “What kind of rock is it?” “Sedimentary” is mumbled. “That’s right. How do you know?” Another mumble: “Fossils.” At least she was getting some kind of answers and they were in very much the right direction, but she was frustrated that she had somehow asked these questions that allowed a one-word way out. “Where did it go?” Ms. G asked. “What do you mean?” came back. “Well, when this rock formed, do you think it just formed all stacked up like this with an almost straight edge sticking out into the air or water or whatever it formed in?” Justin said, “Who cares?” Ooh. They were a frustrating group, but Ms. G kept her cool. “I thought maybe you did when you asked for the coordinates. Come up with an answer that you can support using the information you have and I’ll give you the coordinates to look up on the Map Viewer.” She moved on, hoping they’d try to figure it out.
After letting the frustrating group hash it out a bit longer, Ms. G turned her last question for them to the whole class: “Where did the rock go?” She got the same response as earlier, but from a different student. “What do you mean?” Justin chimed in, more favorably this time: “There doesn’t seem to be much of a stream to have washed it away, but it wouldn’t form just straight up like that, or at least not having that flat, bare rock right at the base of the cliff. I think it’s an old quarry.” From Katelyn’s group came an affirmation – “That’s why she wouldn’t let us look on the topo maps. It’d be marked and give it away. Can we bring it up on the map viewer now?”
Ms. G. had Audrey, from Katelyn’s group, bring the map viewer up on one of the computers and plugged in the coordinates. “I knew it. There’s the quarry symbol!” Ms. G asked what else she could tell from the map. “It’s on the Colgate campus, and there’s dirt road leading into it. I’ll bet it’s where they got the stone for the campus buildings.” Ms. G responded in the affirmative. “Ok, we’ve figured out why it didn’t match the surrounding forest. Now I want you to work through the questions on your sheet and I’ve got another set of questions that are more specific to the quarry.”
-
Why do you think the quarry was dug in this particular location?
-
Colgate’s added a lot of buildings in the last several years, and many of them are stone. But this quarry has obviously been unused for many years. Why do you think they stopped using it?
-
Imagine that Colgate has asked you to find a new quarry site for new science building they plan to construct. Use the geologic and topographic maps to select another quarry site that would likely contain similar stone. Together with your partners, write a proposal for siting the quarry in a particular location. In your proposal, you should address not only the nature of the stone the quarry can produce but also at least three other factors that you determine to be important for siting the quarry. Plan to present this to the rest of the class next week. You may use either a poster or a PowerPoint presentation.